Cute Crochet Plant Decor Pattern – Smiling Flower Pot with Pink Blossoms
Bring a little handmade happiness into your home with this cute crochet plant decor! Featuring a smiling cream flower pot, pretty pink blossoms, and...
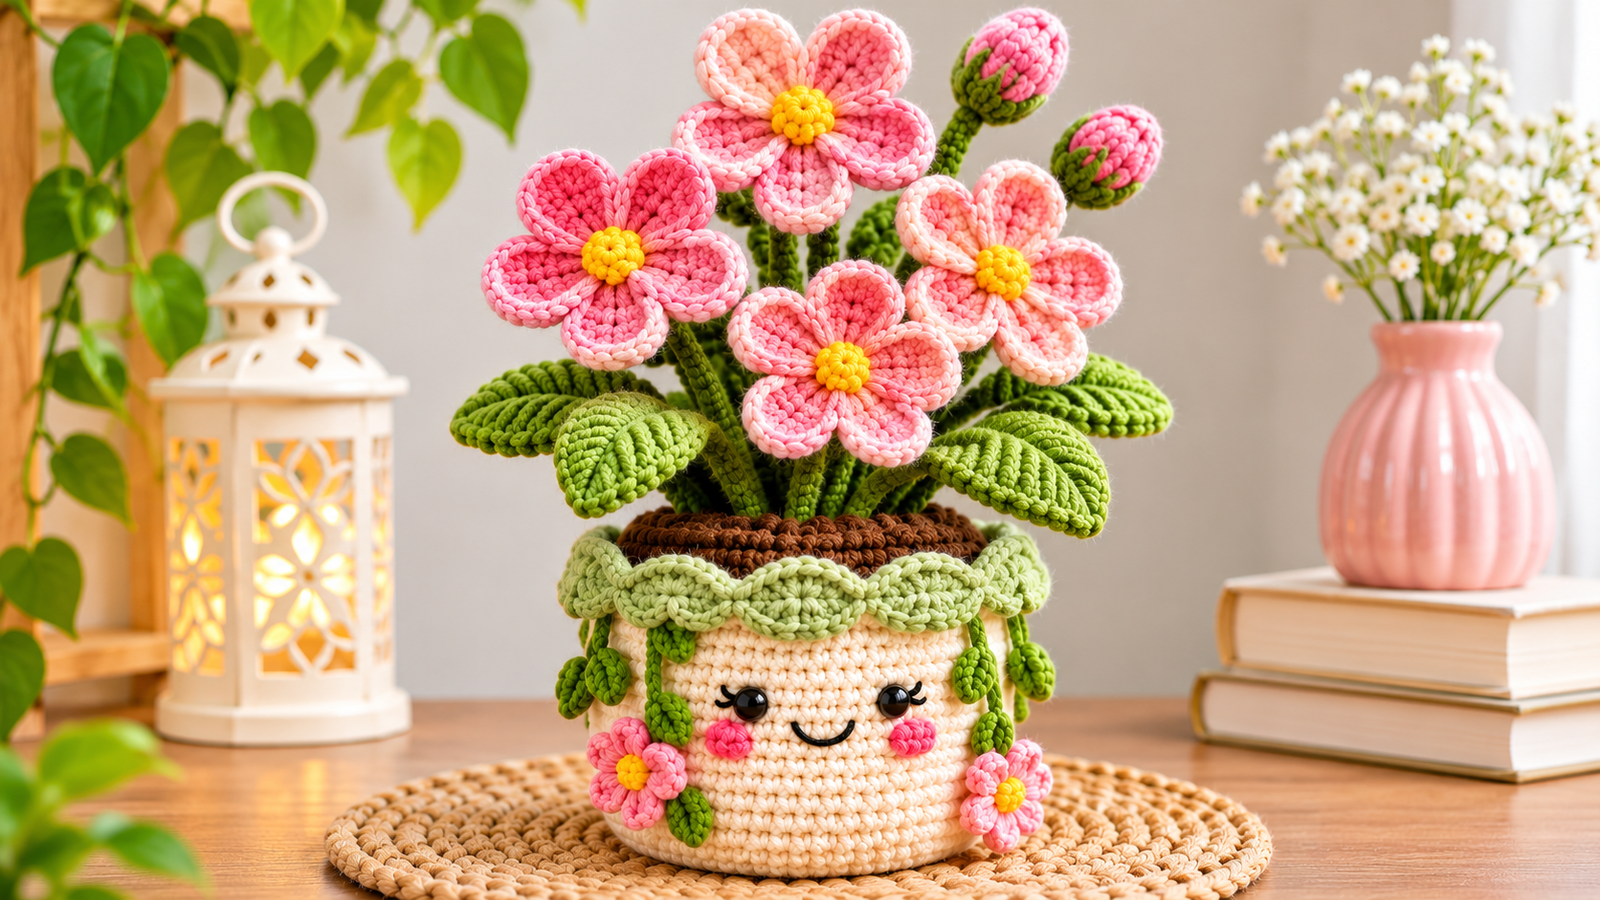
Bring a little handmade happiness into your home with this cute crochet plant decor! Featuring a smiling cream flower pot, pretty pink blossoms, and textured green leaves, this cheerful project makes a lovely decoration for desks, bookshelves, and cozy corners.
This adorable potted flower design combines simple amigurumi techniques with decorative crochet flowers. It’s a fun project for crocheters ready to practice working in rounds and assembling small pieces.
Why You’ll Love This Project
- Adorable smiling flower pot with rosy cheeks.
- Pretty pink blossoms and bright green leaves.
- No watering or sunlight required.
- Great for handmade gifts and desk decorations.
- Easy to customize with different flower colors.
Project Overview
| Detail | Description |
|---|---|
| Skill Level | Intermediate beginner |
| Estimated Time | 6–9 hours |
| Yarn | Worsted weight (Category 4) |
| Hook | 3.5 mm |
| Finished Height | Approximately 7–9 inches |
| Main Stitches | Sc, hdc, dc, sl st |
| Terminology | US crochet terms |
This is an original, untested draft pattern. Finished dimensions and yarn quantities are estimates.
Materials and Supplies Needed
- Cream yarn for the flower pot
- Light and dark pink yarn for flowers
- Olive and sage green yarn for leaves and stems
- Dark brown yarn for soil
- Small amount of yellow yarn for flower centers
- Black embroidery yarn
- Pink yarn for cheeks
- Polyester stuffing
- 3.5 mm crochet hook
- Yarn needle and scissors
- Optional 6 mm safety eyes
- Optional floral wire for supporting stems
Choosing the Right Yarn and Hook
Use smooth cotton or acrylic yarn for clear stitch definition. Cotton gives the pot a firm shape, while soft acrylic is suitable for the flowers.
A 3.5 mm hook creates tight stitches that help keep stuffing hidden.
Crochet Stitches and Abbreviations
- ch: Chain
- sc: Single crochet
- hdc: Half double crochet
- dc: Double crochet
- sl st: Slip stitch
- inc: Two sc in one stitch
- dec: Single crochet decrease
- BLO: Back loop only
Work in continuous rounds unless otherwise indicated.
Before You Start
Use a stitch marker to track the beginning of each round.
Keep your stitches tight and even. Prepare the cream pot first, then make the soil, flowers, leaves, and stems.
If using safety eyes, attach them before stuffing and closing the pot. Safety eyes and wired stems are unsuitable for toys intended for babies or young children.
Step-by-Step Crochet Instructions
Step 1: Crochet the Flower Pot
Using cream yarn, make a magic ring.
- Round 1: 6 sc into magic ring. (6)
- Round 2: Inc around. (12)
- Round 3: 1 sc, inc repeat 6 times. (18)
- Round 4: 2 sc, inc repeat 6 times. (24)
- Round 5: 3 sc, inc repeat 6 times. (30)
- Round 6: 4 sc, inc repeat 6 times. (36)
- Round 7: Sc BLO around. (36)
- Rounds 8–20: Sc around. (36)
Fasten off, leaving the top open.
Embroider a small smile and pink cheeks on the front. Attach safety eyes or embroider closed eyes for a softer expression.
Step 2: Crochet the Soil
Using brown yarn:
- Round 1: 6 sc in magic ring. (6)
- Round 2: Inc around. (12)
- Round 3: 1 sc, inc around. (18)
- Round 4: 2 sc, inc around. (24)
- Round 5: 3 sc, inc around. (30)
- Round 6: 4 sc, inc around. (36)
Fasten off, leaving a long sewing tail.
Keep the soil circle separate until the stems are attached.
Step 3: Make the Pink Flowers
Using pink yarn:
Round 1: Make a magic ring and work 5 sc into it. Join with a sl st.
Round 2: In each sc, work (sl st, ch 2, 3 dc, ch 2, sl st).
You will have five petals.
Fasten off.
Make four flowers.
For each yellow center, work 6 sc into a magic ring, join, and sew the small circle onto the center of a pink flower.
Step 4: Crochet the Green Leaves
Using olive green yarn:
Ch 11.
Starting in the second chain from the hook:
Sc in the first stitch, hdc in the next 2, dc in the next 4, hdc in the next 2, and 3 sc in the final chain.
Continue along the opposite side of the foundation chain:
Hdc in the next 2, dc in the next 4, hdc in the next 2, and sc in the last chain.
Join with a sl st.
Make approximately six leaves.
Step 5: Make the Flower Stems
Using green yarn:
Round 1: Work 6 sc into a magic ring.
Rounds 2–16: Sc around. (6)
Fasten off, leaving a sewing tail.
Make four stems of varying lengths. For shorter stems, work 10–12 rounds instead.
Optional: Insert covered floral wire for stability, ensuring sharp ends are safely enclosed.
Sew the flowers securely onto the stems and attach the leaves at different heights.
Step 6: Add Flower Buds
Using pink yarn:
- Round 1: 6 sc in a magic ring. (6)
- Round 2: Inc around. (12)
- Rounds 3–4: Sc around. (12)
- Round 5: Dec around. (6)
Add a little stuffing and close.
Make two buds and attach them to shorter green stems.
Step 7: Add the Scalloped Pot Edging
Join sage green yarn to the top edge of the cream pot.
Repeat the following sequence six times:
Sl st in next stitch, skip 1 stitch, 5 dc in next stitch, skip 1 stitch, sl st in next stitch, sc in next stitch.
Fasten off and weave in the end.
This creates six decorative scallops around the rim.
Assembly and Finishing
Sew the stems to the brown soil circle, arranging the blossoms at different heights.
Fill the cream pot firmly with polyester stuffing, then sew the soil circle securely inside the top opening.
For extra decoration, attach short green chain vines and small pink flowers along the outside of the pot.
Weave in all loose ends and gently shape the blossoms.
Tips for Best Results
- Use firm stitches to keep the pot standing upright.
- Arrange flowers before attaching them permanently.
- Vary stem heights for a natural bouquet.
- Use small amounts of stuffing to avoid distorting the pot.
- Secure all decorative elements carefully.
Common Mistakes and Troubleshooting
Pot looks uneven: Count stitches after every increase round.
Flowers won’t stand upright: Shorten the stems or add properly enclosed support wire.
Leaves look curled: Adjust stitch tension and gently shape them.
Pot tips over: Add a little more stuffing and ensure the base sits flat.
Creative Variations
Try lavender flowers for a soft pastel look, yellow daisies for cheerful spring decor, or red blossoms for a bold centerpiece.
You can also make the pot in terracotta, blush pink, or mustard yellow.
How to Use or Style Your Crochet Project
Place your crochet flower pot on a desk, windowsill, bookshelf, or bedside table.
It also makes a thoughtful handmade gift for birthdays, housewarmings, and plant lovers.
Care and Maintenance
Gently dust the flowers and leaves with a soft brush.
Spot-clean when necessary, and avoid soaking the stuffed pot or bending supported stems.
Keep away from prolonged direct sunlight to minimize fading.
Frequently Asked Questions
Is this project beginner-friendly?
Confident beginners familiar with basic crochet rounds can make it, although assembling the flowers requires patience.
Can I use different yarn?
Yes. Adjust your hook size to keep the stitches tight.
Do I need floral wire?
No, but optional wire helps taller stems maintain their shape.
Can I make a bigger flower pot?
Yes. Use thicker yarn and a suitable larger hook, or add increase rounds and adjust the body accordingly.
Conclusion
This cute crochet plant decor brings color, texture, and personality to any space. With its smiling flower pot and charming pink blossoms, it’s a fun handmade project that you can enjoy all year.
Related Crochet Projects to Try Next
- Mini Crochet Succulent Pot
- Crochet Daisy Bouquet
- Cute Crochet Cactus
- Crochet Hanging Plant
- Mini Crochet Sunflower
Each offers another creative way to decorate your home with handmade crochet plants.