Beginner Crochet Cardigan Pattern with Simple Panels
This relaxed open-front crochet cardigan uses simple rectangular panels, half double crochet rows, and a clean contrasting border. Its deep teal body and warm...
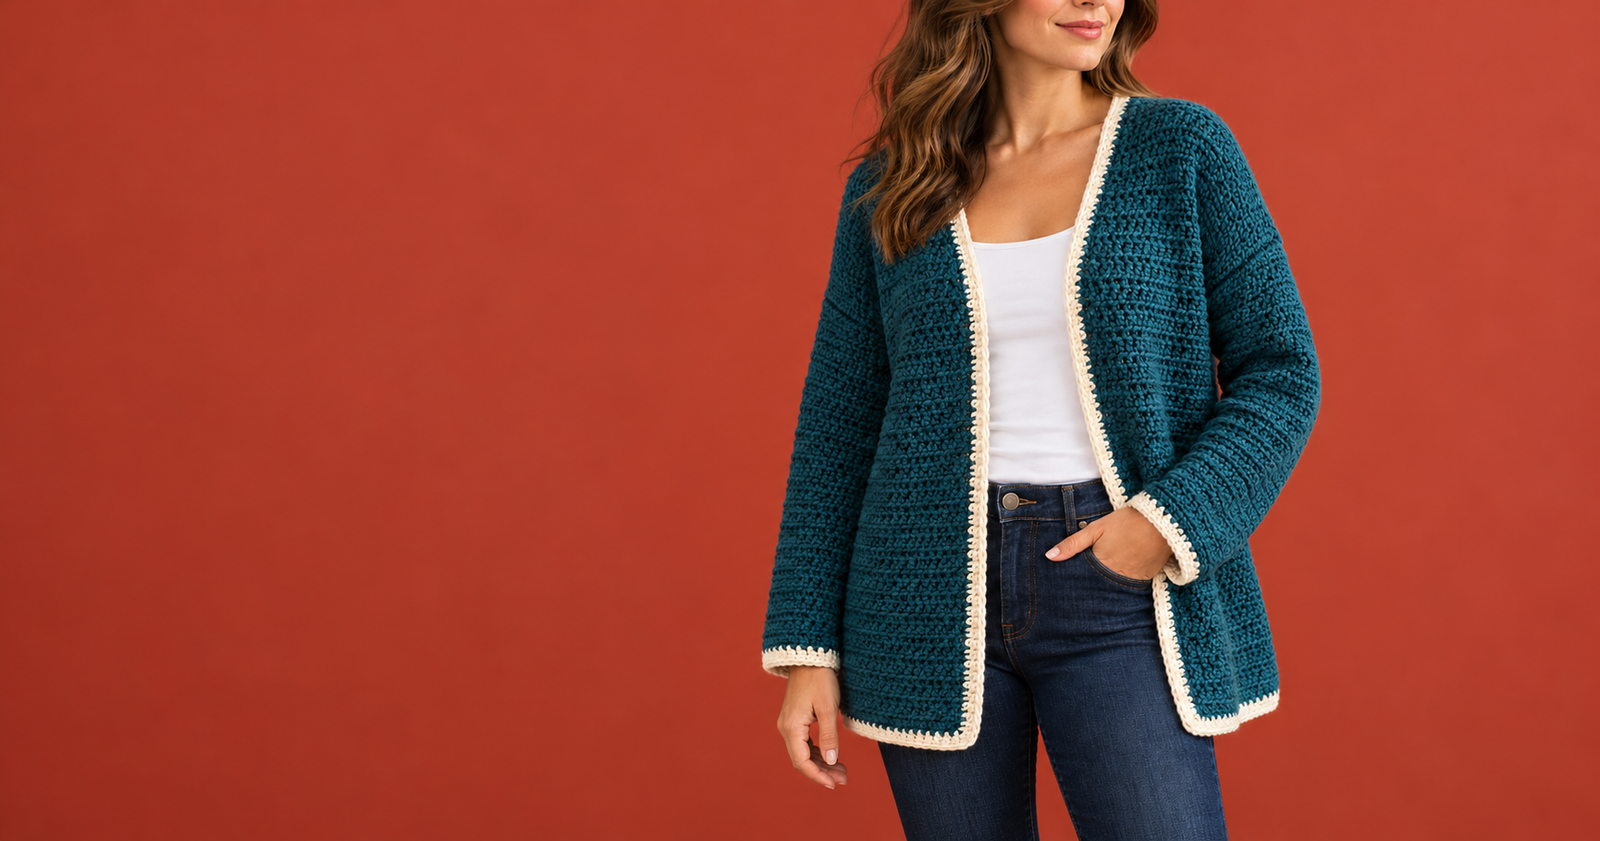
This relaxed open-front crochet cardigan uses simple rectangular panels, half double crochet rows, and a clean contrasting border. Its deep teal body and warm ivory edging create a polished look, while the construction keeps shaping to a minimum. The pattern is written for an estimated adult medium and uses US crochet terms.
The image is AI-generated, and these draft instructions have not been physically tested. Check your gauge and measurements as you work, since yarn, tension, and blocking can change the finished size.
Why You’ll Love This Project
The cardigan is made from a back panel, two front panels, and two sleeve rectangles. You’ll work mostly straight rows, then sew the pieces together and add a simple single crochet border.
The open-front style makes it easy to layer over a shirt or dress. You can also customize the length, sleeve fit, and edging color without changing the basic construction.
Project Overview
- Project: Relaxed open-front cardigan
- Difficulty: Beginner, with basic sewing and garment assembly
- Estimated time: 20–30 hours
- Estimated finished measurements: About 42 inches around the body and 22 inches long
- Yarn: Worsted-weight yarn
- Hook: 6.0 mm (US J-10), or size needed to meet gauge
- Main techniques: Half double crochet, single crochet, sewing panels
- Construction: Flat panels joined at shoulders and sides, with separate sleeves
- Terminology: US crochet terms
These estimates describe one size and may vary with yarn choice, tension, and blocking.
Materials and Supplies Needed
- About 1,300–1,500 yards of worsted-weight yarn in deep teal
- About 100–150 yards of worsted-weight yarn in warm ivory
- 6.0 mm (US J-10) crochet hook, or size needed for gauge
- Tapestry needle
- Scissors
- Measuring tape
- Stitch markers or safety pins
Yardage is an estimate; buy extra if you plan to lengthen the body or sleeves.
Choosing the Right Yarn and Hook
A smooth worsted-weight yarn makes the stitch pattern easy to see and gives the fabric enough body for a casual cardigan. Acrylic, wool, cotton, or a blend can work. Consider the yarn label’s care instructions and how the fiber will drape.
Use the hook that gives you the stated gauge. A hook that is too small can make the fabric stiff; a larger hook can create a looser, drapier cardigan. If you substitute yarn, make a swatch first and be prepared for the finished garment’s size and weight to change.
Crochet Stitches and Abbreviations
- ch — chain
- sc — single crochet
- hdc — half double crochet
- sl st — slip stitch
- st / sts — stitch / stitches
Half double crochet (hdc): Yarn over, insert the hook into the stitch, yarn over and pull up a loop, then yarn over and pull through all three loops.
Single crochet (sc): Insert the hook into the stitch, yarn over and pull up a loop, then yarn over and pull through both loops.
Before You Start
Work a gauge swatch in half double crochet and measure it after gently washing or blocking it the way you plan to finish the cardigan. Aim for 12 hdc and 10 rows over 4 inches.
The pattern is based on one estimated adult-medium size. Measure your chest and compare it with the finished circumference before beginning. For a closer or looser fit, adjust the panel widths in multiples of 2 stitches, and check the armhole and sleeve fit during assembly.
Turning chains do not count as stitches. Work the first hdc of each row into the first stitch.
Step-by-Step Crochet Instructions
Back Panel
With teal yarn, ch 65.
Row 1: Hdc in the third ch from the hook and in each ch across. (63 sts)
Rows 2–55: Ch 2, turn, hdc in each st across. (63 sts)
Fasten off. The panel should measure about 21 inches wide by 22 inches long.
Front Panels
Make 2. With teal yarn, ch 34.
Row 1: Hdc in the third ch from the hook and in each ch across. (32 sts)
Rows 2–55: Ch 2, turn, hdc in each st across. (32 sts)
Fasten off. Each panel should measure about 10 2/3 inches wide by 22 inches long. The front panels together should be close to the back panel’s width.
Sleeve Panels
Make 2. With teal yarn, ch 47.
Row 1: Hdc in the third ch from the hook and in each ch across. (45 sts)
Rows 2–43: Ch 2, turn, hdc in each st across. (45 sts)
Fasten off. Each panel should measure approximately 15 inches wide by 17 inches long. The 15-inch edge will form the sleeve circumference, and the 17-inch edge will run from shoulder to cuff.
Join the Shoulders
Lay the back panel flat with the right side facing up. Place one front panel at each side, with the right sides together and the outer edges aligned.
On each front panel, mark 21 stitches along the top edge nearest its outer side edge. Mark the corresponding 21 stitches at each end of the back panel. Sew each marked section together using a whipstitch or mattress stitch. Leave the center portions unsewn to create the open neckline.
Sew the Side Seams
Fold the cardigan at the shoulders so the front and back panels are aligned, with right sides together. Starting at each lower hem, sew the side edges upward for about 14 inches. Leave the remaining 8 inches open for the armhole.
Try the body on or check it against a garment with a comfortable fit before securing the seams.
Form and Attach the Sleeves
Fold each sleeve panel lengthwise, with the right sides together. Sew the long edges together to form a tube. Keep the seam on the underside of the sleeve, then turn the tube right side out.
Pin the top of the sleeve tube evenly around an armhole, matching the sleeve seam to the underarm seam. The sleeve opening may need slight easing to fit the armhole. Sew it in place. Repeat for the second sleeve.
Add the Ivory Cuffs
Join ivory yarn at the sleeve seam. Work one round of sc evenly around the cuff opening, placing one sc in each stitch or row end. Join with a sl st to the first sc and fasten off. Repeat for the other sleeve.
Add the Front and Hem Border
With the cardigan right side out, join ivory yarn at one lower front corner. Work sc along the bottom edge, up the first front opening, around the exposed neckline edges, down the other front opening, and back along the bottom edge.
Work one sc in each stitch along horizontal edges and about one sc in each row end along vertical edges. At corners, add enough stitches to keep the border flat. Join with a sl st and fasten off. For a wider border, work a second round of sc, placing 2 sc at each corner.
Assembly and Finishing
Weave in all yarn ends securely on the wrong side. Check that both sleeves hang evenly and that the shoulder and side seams are secure. If the fabric needs shaping, wet-block the cardigan according to the yarn label, then lay it flat to dry.
Tips for Best Results
- Count stitches at the end of each row to keep the panels consistent.
- Use stitch markers to identify shoulder sections and armhole openings.
- Check the cardigan’s fit before closing the side seams.
- Keep the ivory edging relaxed; tight border stitches can pull the fronts inward.
- Measure the panels after blocking your gauge swatch so the estimates are meaningful.
Common Mistakes and Troubleshooting
The panels are wider or narrower than expected. Your stitch gauge may differ. Change hook size or adjust stitch counts, then recheck the measurements.
The front edges curl. Check whether your edging is too tight. Blocking may help, but a looser border round is often the better fix.
The sleeves feel too tight. Measure the sleeve and armhole before sewing. Add rows to the sleeve width if needed, while keeping the armhole opening in mind.
The shoulders sit too far inward. Confirm that the shoulder seams start at the outer edges and that you join the marked sections on both the back and front panels.
Creative Variations
Use a contrasting color for the cuffs and front border, or choose a single color for a quieter look. Add body length by working more rows on the back and front panels. For longer sleeves, add rows to each sleeve panel before seaming.
For a closer fit, reduce the panel widths evenly. Make size changes gradually and compare the pieces with a cardigan that fits well.
How to Use or Style Your Crochet Project
Wear the cardigan open over a fitted top, a simple dress, or a long-sleeved shirt. The relaxed shape works well as a lightweight indoor layer. If you want to close the fronts, you can add a simple tie or a button after finishing, making sure the fastening does not distort the edge.
Care and Maintenance
Follow the care instructions on your yarn label. Hand washing and flat drying can help preserve the cardigan’s shape, especially if it contains wool or another fiber that may stretch. Store it folded rather than hanging to reduce shoulder stretching.
Frequently Asked Questions
Is this crochet cardigan suitable for beginners?
It uses basic stitches and straight panels, so it is approachable for beginners who are comfortable counting rows and sewing seams. Garment assembly may take practice.
Can I use a different yarn weight?
Yes, but the finished size and drape will change. Make a gauge swatch and adjust the stitch and row counts to match your measurements.
How can I make the cardigan longer?
Add rows evenly to the back and both front panels. If you add significant length, you may need more yarn.
Can I make the sleeves wider?
Add stitches to the sleeve foundation chain, keeping the added width in mind when fitting the sleeve to the armhole.
Does this pattern include shaping?
The draft uses straight panels and simple drop shoulders. It does not include fitted waist or sleeve-cap shaping.
How do I keep the front border from rippling?
Space the sc evenly along row edges and avoid adding too many stitches. If the border flares, remove it and work fewer stitches along the vertical edges.
Conclusion
This open-front crochet cardigan combines easy half double crochet panels with a simple contrasting border. Its straightforward construction gives you room to adjust the length, color, and fit. Check your gauge, take measurements as you assemble, and personalize the details to suit your wardrobe.