Crochet Socks Pattern: Cozy Speckled Ankle Socks
A handmade pair of crochet socks can make a quiet afternoon at home feel even more comfortable. This crochet socks pattern guide takes inspiration...
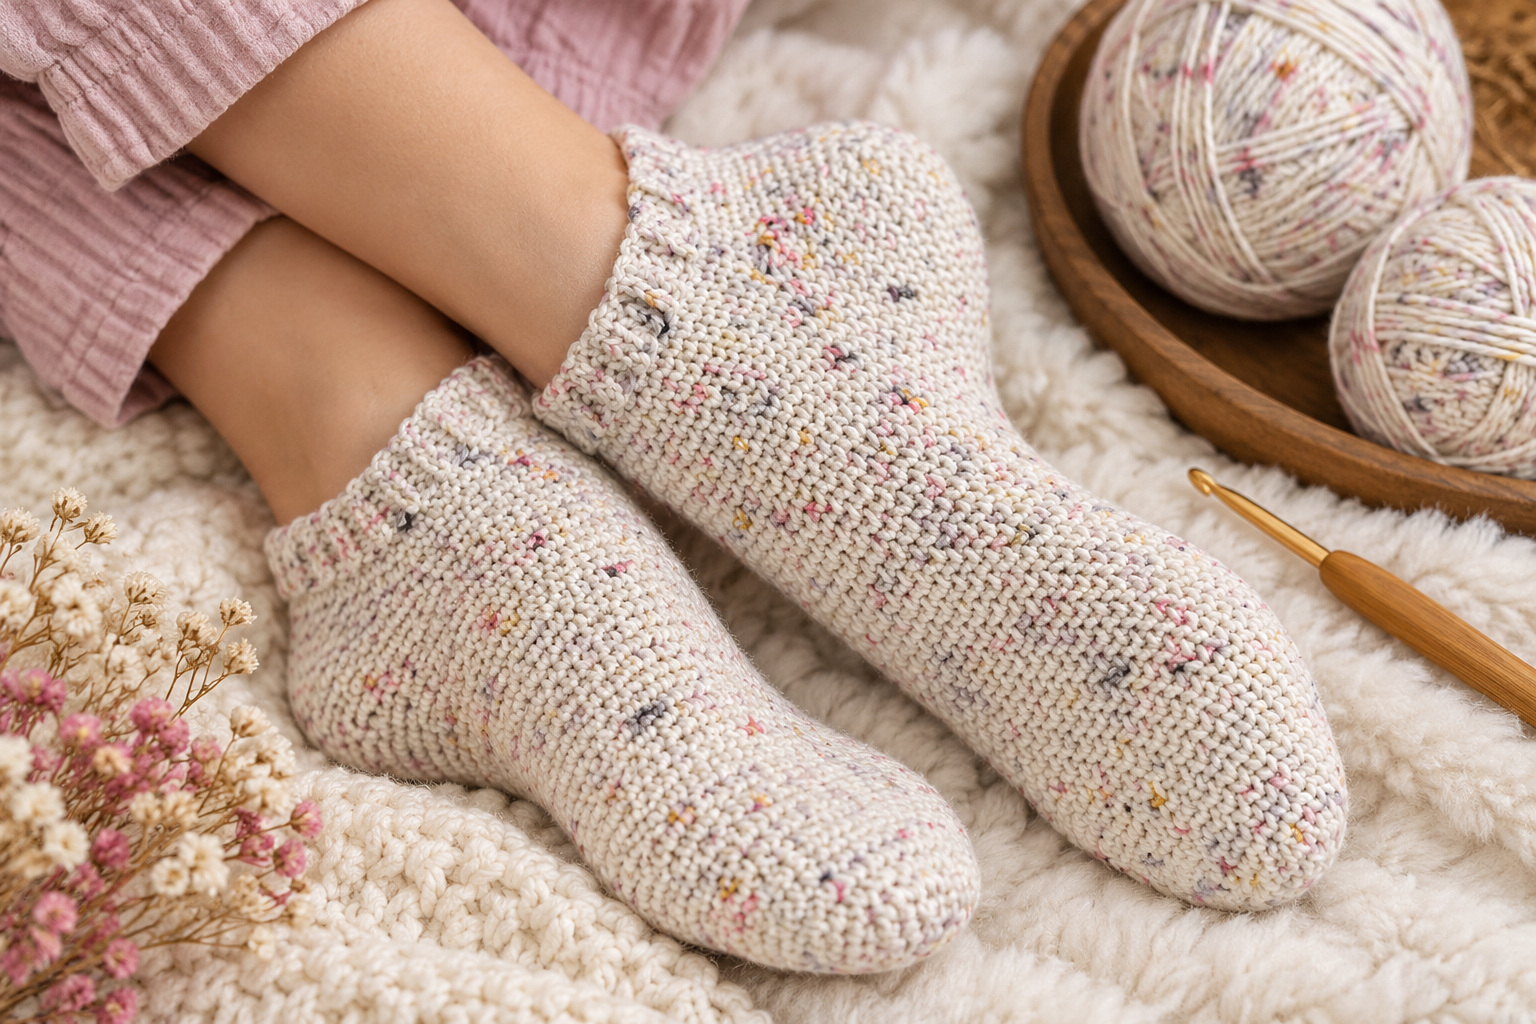
A handmade pair of crochet socks can make a quiet afternoon at home feel even more comfortable. This crochet socks pattern guide takes inspiration from a beautifully textured ankle sock made with soft cream yarn and delicate flecks of pink, yellow, gray, and muted red.
The sock in the photograph features a rounded toe, closely worked stitches, a shaped heel, and a simple ankle opening. Its subtle speckled yarn creates visual interest without requiring complicated color changes or decorative patterns.
If you enjoy practical crochet projects, this style is a lovely way to explore wearable accessories while improving your stitch consistency and shaping techniques.
Throughout this guide, you’ll learn how to select suitable yarn, understand basic sock construction, shape the toe and heel, and create a comfortable ankle cuff.
You’ll also find sizing advice, troubleshooting tips, and creative variations.
The instructions describe an adaptable construction approach inspired by the photograph rather than an exact, stitch-tested reproduction.
What Makes This Crochet Socks Pattern Special?
The beauty of these socks comes from their simplicity.
Instead of decorative cables, lace panels, or contrasting stripes, the design relies on smooth crochet stitches and softly speckled yarn.
The tiny colored flecks are distributed naturally throughout the cream background, creating a delicate handmade appearance.
Why Speckled Crochet Socks Are Popular
Speckled yarn adds color without requiring frequent yarn changes.
As you crochet, the small colored sections appear at different points across the fabric, giving each sock a slightly unique appearance.
This makes speckled yarn especially appealing for simple stitch patterns.
The resulting socks can look interesting and detailed even when the construction remains straightforward.
What Type of Socks Are These?
The photographed sock appears to be an ankle-length design with a relatively smooth foot and a gently fitted opening.
It is suitable as inspiration for lightweight indoor socks or casual handmade accessories.
The exact fiber content, stitch pattern, and original construction method cannot be determined from the image alone.
Skill Level and Time Needed
This project is most appropriate for confident beginners.
You should already understand how to crochet chains, single crochet stitches, increases, and decreases.
Working in rounds and learning heel shaping will make the project more challenging than a basic scarf or dishcloth.
However, practicing each technique separately can make the construction easier to understand.
How Long Does It Take?
The time required depends on the sock size, yarn thickness, stitch pattern, and your experience.
A beginner may need several crafting sessions to complete a matching pair.
The first sock often takes longer because you are learning the construction and checking measurements.
The second usually progresses more smoothly when you follow your notes.
Materials and Tools for Crochet Socks
Choosing comfortable yarn and appropriate tools is essential for wearable crochet projects.
For socks inspired by the photograph, gather:
- Cream speckled sock yarn with subtle colored flecks
- Crochet hook suitable for the selected yarn
- Yarn needle for weaving in ends
- Sharp scissors
- Stitch markers
- Flexible measuring tape
- Notebook or row counter
- Optional sock blockers
- Optional contrasting yarn for marking heel placement
Choosing the Best Yarn
For socks intended for regular wear, yarn containing wool and nylon can offer a useful combination of elasticity, warmth, and durability.
Fine sock yarn is often a practical choice when you want a relatively lightweight fabric.
Cotton blends may feel cooler but generally have less natural stretch.
Soft acrylic blends can also work for casual indoor socks, depending on their construction.
Choose yarn that feels comfortable against the skin and is suitable for your intended washing routine.
Choosing the Right Crochet Hook
Start with the hook size recommended by your yarn manufacturer.
Make a gauge swatch before beginning the socks.
The stitches should form a relatively firm fabric without feeling stiff or uncomfortable.
If your sample is too tight, try a slightly larger hook.
If it feels loose or overly open, experiment with a smaller hook.
Crochet Stitches and Abbreviations
The following abbreviations use US crochet terminology.
| Abbreviation | Meaning |
|---|---|
| ch | Chain |
| sc | Single crochet |
| hdc | Half double crochet |
| dc | Double crochet |
| sl st | Slip stitch |
| st | Stitch |
| sts | Stitches |
| rnd | Round |
| inc | Increase |
| dec | Decrease |
| sc2tog | Single crochet two together |
| BLO | Back loop only |
| FLO | Front loop only |
Understanding the Stitch Texture
The sock in the photograph has closely spaced stitches that create a smooth, compact fabric.
Single crochet is one possible technique for achieving a similar appearance.
Half double crochet can also produce a relatively dense fabric, depending on the hook size and yarn.
For a subtle textured effect, experiment with working into different loops.
The best stitch choice is one that balances durability, flexibility, and comfort.
Step-by-Step Crochet Socks Pattern Guide
The following method describes a general toe-up sock construction with a shaped heel and simple ankle opening.
Because the exact stitch counts and construction details are not visible in the photograph, use this as a flexible technique guide. A tested, size-specific pattern is recommended when exact round-by-round instructions are needed.
Step 1: Measure Your Feet
- Measure from the back of your heel to your longest toe.
- Measure around the widest part of your foot.
- Record your ankle circumference.
- Decide how high you want the sock opening.
- Write down your measurements.
Measure both feet if possible.
Small differences in foot size are common, so consider the larger foot when planning the fit.
Step 2: Crochet a Gauge Swatch
Make a sample using your chosen yarn, hook, and stitch pattern.
Work enough rows to measure the gauge accurately.
Count the stitches and rows within a measured area.
Check the fabric’s flexibility by stretching it gently.
If the yarn is washable, follow the label instructions to wash and dry the swatch before measuring again.
This helps you understand whether the finished socks may change size after laundering.
Step 3: Begin the Rounded Toe
Start with a small foundation chain or a suitable toe-up oval method.
Work around the foundation, placing increases at the ends.
Continue increasing gradually until the toe reaches the desired width.
The reference sock has a softly rounded toe without a pronounced point.
Try the developing toe against your foot.
It should cover your toes comfortably without squeezing or leaving excessive loose fabric.
Step 4: Crochet the Foot Section
Once the toe reaches the required circumference, continue working evenly.
Use a stitch pattern that creates a smooth and flexible fabric.
Maintain consistent tension as the sock grows.
The speckled yarn will naturally distribute small colored flecks throughout the stitches.
Check the fit periodically.
Stop at the point required for your chosen heel construction.
Step 5: Choose a Heel Method
The heel is one of the most important parts of a comfortable crochet sock.
Two common approaches are short-row heels and afterthought heels.
A short-row heel uses partial rows to shape the fabric around the back of the foot.
An afterthought heel is worked into an opening prepared during the sock construction.
Choose a method that suits your skill level and preferred fit.
Step 6: Shape the Heel
For a short-row heel, work back and forth across the designated heel stitches.
Gradually shorten the rows to form the heel cup.
Follow the turning and joining technique required by your chosen method.
Pay attention to gaps at the edges.
Try the sock on before completing the heel.
The heel should sit comfortably without pulling the toe or ankle sections out of position.
Step 7: Crochet the Ankle
After completing the heel, continue crocheting around the ankle.
Maintain an even circumference unless adjustments are required.
The ankle opening should stretch comfortably over the heel.
Work until the sock reaches your preferred height.
The photographed design has a relatively short ankle section, giving it a simple, casual appearance.
Step 8: Finish the Cuff
A neat cuff helps the sock stay in place.
You can finish the opening with several rounds of a flexible stitch pattern.
Another option is to add a short ribbed band using back-loop-only stitches.
Avoid making the cuff excessively tight.
Try the sock on before fastening off to confirm that the opening feels comfortable.
Step 9: Make the Second Sock
Repeat the same construction for the second sock.
Use your notes to match the stitch counts, rounds, and measurements.
Speckled yarn may distribute colors differently between the two socks.
This natural variation is part of the charm of using multicolored yarn.
Focus on matching the size and shape rather than the exact placement of every colored fleck.
Step 10: Finish and Check the Fit
Fasten off securely and weave in loose yarn ends.
Keep the inside of the sock smooth to avoid uncomfortable pressure points.
Try on both socks and check the toe, heel, and ankle.
Walk a few steps indoors to assess the fit.
Remember that crochet soles can be slippery on smooth flooring, so consider suitable non-slip treatments for indoor use.
Crochet Sock Sizing and Fit Tips
A comfortable sock should fit closely without restricting movement.
Adjusting the Foot Length
Measure your foot carefully and account for the space needed by the heel construction.
Do not rely entirely on shoe size because foot proportions vary.
Adjusting the Width
Use your gauge to estimate the required circumference.
If the fabric has limited stretch, allow enough room for comfort.
If it stretches well, a slightly smaller finished circumference may provide a secure fit.
Choosing the Right Yarn Weight
Fine yarn creates lighter socks that may fit inside shoes.
Thicker yarn produces warmer, bulkier socks that are often more suitable for indoor wear.
Always check your gauge when substituting yarn.
Common Crochet Sock Mistakes
Socks That Are Too Tight
Tight stitches can prevent the sock from stretching comfortably.
Test the fabric before beginning the full project.
Uneven Heel Shaping
Inconsistent short rows can create a poorly fitting heel.
Use stitch markers and follow your chosen heel method carefully.
Loose Ankle Openings
An opening that is too wide may slide down during wear.
Check the circumference before finishing the cuff.
Different Sock Lengths
Changes in tension can make one sock longer than the other.
Measure both socks regularly and record your progress.
Finishing, Blocking, and Care
Proper finishing helps handmade socks maintain their shape and comfort.
Blocking Crochet Socks
Light blocking can improve stitch consistency.
Follow the yarn manufacturer’s care instructions.
If suitable, dampen the socks gently and reshape them without excessive stretching.
Allow them to dry completely.
Washing Handmade Socks
Hand washing is often a gentle option for delicate crochet socks.
Some sock yarns are machine washable, depending on their fiber content.
Always check the label before washing.
Dry flat when recommended.
Storing Your Socks
Store socks clean and completely dry.
Fold them loosely to avoid stretching the cuffs.
Repair small worn areas promptly to prevent further damage.
Creative Crochet Sock Variations
Pastel Speckled Socks
Choose cream yarn with soft pink, yellow, and lavender flecks for a delicate appearance.
Neutral Everyday Socks
Use oatmeal, beige, gray, or taupe yarn for a timeless design.
Colorful Confetti Socks
Choose yarn with brighter multicolored speckles for a playful finish.
Ribbed Ankle Socks
Add a short ribbed cuff to create extra texture around the ankle.
Cozy Slipper Socks
Use thicker yarn and a slightly roomier construction for comfortable indoor wear.
Consider adding suitable non-slip sole treatments.
Gift Ideas and Everyday Uses
Handmade crochet socks make thoughtful gifts for birthdays, holidays, and cozy winter celebrations.
Speckled yarn adds a charming decorative touch without requiring complicated colorwork.
Wrap the finished pair with a simple ribbon and include washing instructions.
For personal use, soft crochet socks are lovely for relaxing at home.
If you plan to sell finished socks, provide accurate sizing, fiber content, and care information.
Consider material costs, crafting time, and packaging when setting prices.
Frequently Asked Questions
Are Crochet Socks Suitable for Beginners?
Confident beginners can learn to crochet socks with practice. Basic stitches are straightforward, but shaping the toe and heel requires additional attention. Start with a simple construction method, make a gauge swatch, and check the fit regularly.
What Yarn Is Best for Crochet Socks?
Sock yarn containing wool and nylon is a practical option because it offers warmth, elasticity, and durability. Cotton blends and acrylic blends can also work for certain designs. Choose yarn based on comfort, intended use, and washing requirements.
Can Crochet Socks Be Worn Inside Shoes?
Yes, provided the fabric is thin and flexible enough. Fine sock yarn is generally more suitable for fitted shoes than bulky yarn. Check that the stitches and seams do not create uncomfortable pressure points.
How Do I Make Crochet Socks Stretchy?
Choose yarn with suitable elasticity and use a flexible stitch pattern. Ribbed cuffs can improve stretch around the ankle. Make a gauge swatch and check that the sock opening stretches comfortably over the heel.
How Do I Keep Both Socks the Same Size?
Use the same yarn, hook, gauge, and construction method for both socks. Record stitch counts, rounds, and measurements. Compare the socks regularly to catch differences before finishing.